
이제 생성한 EC2로 접속해보겠습니다!
저는 윈도우 환경에서 진행합니다 🏃♂️🏃♂️
PuTTY
putty 프로그램을 사용합니다
다음 사이트에서 실행 파일을 받을 수 있습니다
Download PuTTY - a free SSH and telnet client for Windows
Is Bitvise affiliated with PuTTY? Bitvise is not affiliated with PuTTY. We develop our SSH Server for Windows, which is compatible with PuTTY. Many PuTTY users are therefore our users as well. From time to time, they need to find the PuTTY download link. W
www.putty.org
putty.exe / puttygen.exe 파일을 사용합니다
1.pem 키를 ppk 파일로 변환
putty는 pem 키로 사용이 안되기 때문에 puttygen에서 ppk 파일로 변환해줍니다
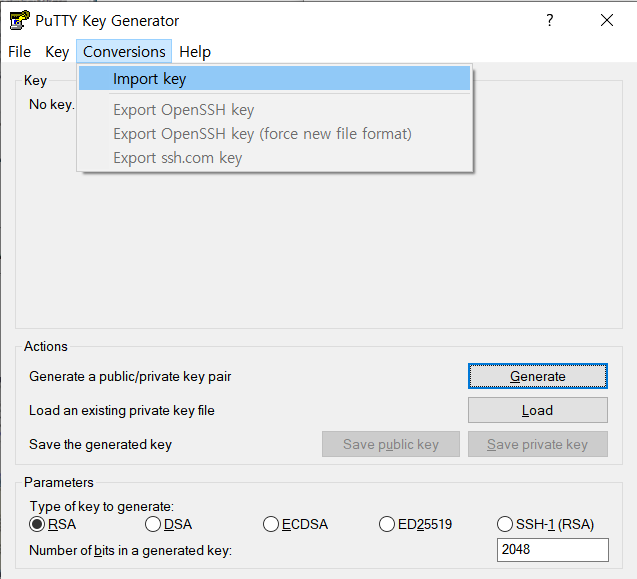
1-1. puttygen.exe 실행

1-2. Conversions > Import Key
내려받은 pem 키를 선택합니다
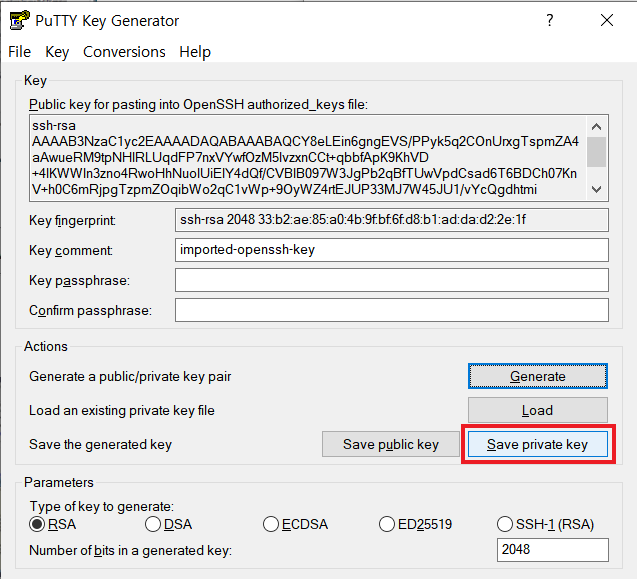
1-3. Save private key
ppk 파일을 생성합니다
경고 메시지가 뜨면 [예]를 클릭!

2. ppk
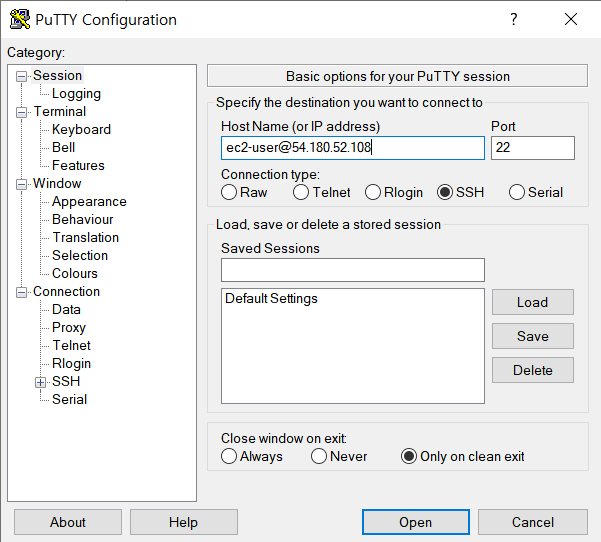
2-1. putty.exe 실행
HostName에는 ec2-user@탄력적 IP 주소 입력
Port는 ssh 접속 포트인 22
Connection type은 SSH 선택
2-2. Connection > SSH > Auth > Private key file for authentication [Browse...]
1. 에서 생성했던 ppk 파일을 불러옵니다

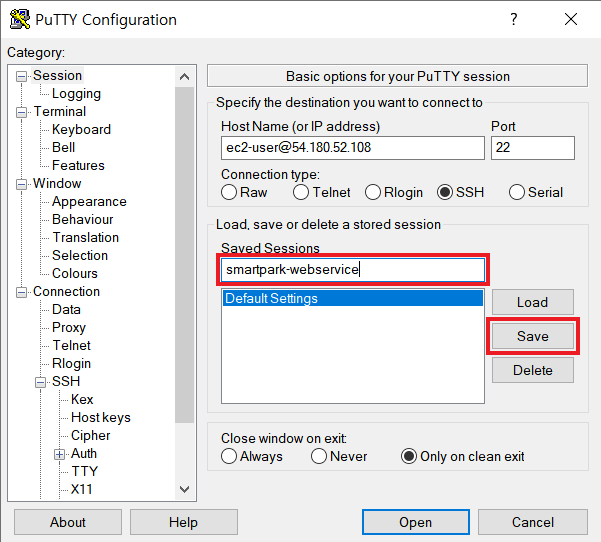
2-3. Session > Saved Sessions
현재 설정들을 저장할 이름을 등록하고 [Save]
2-4. SSH 접속
[Open] 버튼을 누르고 다음과 같은 SSH 접속 알림이 뜨면 [예] 클릭

2-5. ⭐ EC2 접속 성공 ⭐

References
'Cloud' 카테고리의 다른 글
| [AWS RDS] EC2와 RDS 연동하기 / EC2에서 RDS 접근하기 (0) | 2021.11.06 |
|---|---|
| [AWS RDS] 데이터베이스 RDS 인스턴스 생성 / 파라미터 그룹 생성과 연결 (0) | 2021.11.06 |
| [AWS EC2] 아마존 리눅스 2 설정 : 타임존 변경, HOSTNAME 변경 (0) | 2021.11.06 |
| [AWS EC2] EC2 인스턴스 생성 / 탄력적 IP 연결 (0) | 2021.11.05 |
| [AWS EC2] AWS EC2 시작하기 : 서버 구동 방법, 클라우드 종류 (0) | 2021.11.04 |